
Foam Gun Magic: The Ultimate Guide to Properly Utilizing Your Foam Gun for Car Washing
When it comes to washing your car, using the right tools can make all the difference. One tool that has gained immense popularity among car enthusiasts and professional detailers alike is the foam gun. If you’ve ever wondered how to make the most of this fantastic tool, you’re in the right place. In this guide, we’ll dive deep into the world of foam guns and show you how to properly utilize them for a spotless and dazzling car wash.
Understanding the Foam Gun
Before we get into the nitty-gritty of foam gun usage, it’s essential to understand what a foam gun is and how it works. A foam gun is a specialized tool designed to create a thick foam from your car wash soap or shampoo mixture. This thick foam is then sprayed onto your car’s surface, where it clings to dirt and grime, loosening it and making it easier to remove. The result? A more efficient and effective car wash.
Step-by-Step Guide to Using a Foam Gun
Step 1: Gather Your Materials
Before you start, ensure you have the following:
- A high-quality foam gun
- Car wash soap or shampoo
- A clean bucket
- A hose with a high-pressure nozzle
- Microfiber wash mitts or sponges
- A drying towel
- A shady spot to wash your car (to prevent premature drying of the soap)
Step 2: Prepare Your Soap Mixture
Fill your clean bucket with water and add the recommended amount of car wash soap or shampoo. Be sure to follow the manufacturer’s instructions for the correct soap-to-water ratio. Stir the mixture to create a consistent solution.
Step 3: Connect Your Foam Gun
Attach your foam gun to the hose, following the manufacturer’s instructions. Most foam guns have an adjustable dial or nozzle that allows you to control the foam’s thickness. Start with a moderate setting and adjust as needed.
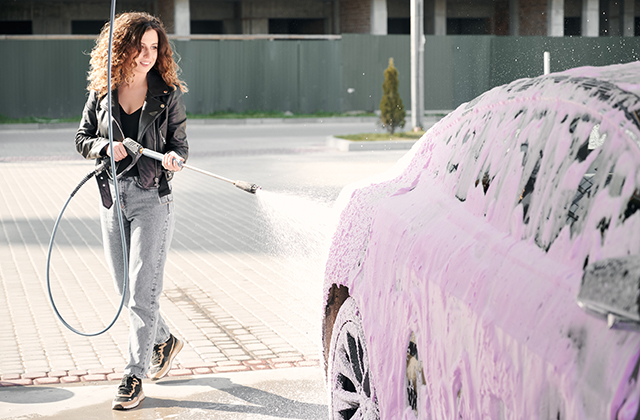
Step 4: Apply the Foam
With your foam gun ready, start spraying the foam onto your car’s surface from top to bottom. The foam should cover the entire car, creating a thick, even layer. Allow the foam to dwell on the surface for a few minutes, but avoid letting it dry.
Step 5: Agitate and Rinse
Using your microfiber wash mitts or sponges, gently agitate the foam to lift dirt and grime. Work your way from top to bottom, using a straight-line motion to minimize swirl marks. After agitating, rinse your car thoroughly with a high-pressure hose to remove the foam and loosened contaminants.
Step 6: Dry Your Car
Finally, dry your car using a clean, lint-free drying towel. Pat the surface gently to prevent scratching and water spots. Your car should now be sparkling clean and ready to hit the road.
Foam Gun Benefits
Using a foam gun for car washing offers several advantages:
- Efficiency: The thick foam covers the entire car, ensuring thorough cleaning and reducing the need for scrubbing.
- Gentle on Paint: Foam is less abrasive than traditional washing methods, reducing the risk of scratches and swirl marks.
- Time-Saving: Foam guns speed up the car washing process, making it more convenient for busy car owners.
- Fun Factor: Let’s face it, using a foam gun is just plain fun!
In conclusion, if you want to achieve a showroom-quality car wash, incorporating a foam gun into your routine is a smart move. Properly utilizing this tool, as outlined in our step-by-step guide, will help you maintain the beauty and integrity of your vehicle’s paint while making the car washing process more enjoyable. So, grab your foam gun, get foamy, and watch your car shine like never before!
Remember, whether you’re a seasoned car enthusiast or a weekend warrior, mastering the art of the foam gun will leave your car looking stunning and turning heads wherever you go. Happy foaming! Using car detailing products from Waxit you can find a lot of different types of foam gun.